Do you have animals escaping, or want to brush up your knowledge on creating habitats?
You’re in the right place – we’ve covered everything in this guide on barriers in Planet Zoo so that you can build the perfect home for your animals.
Basics of Barriers
Barriers are used to keep animals contained so that they can’t escape. Once barriers have been built, a habitat will be created which an animal can live in.
All barriers require a habitat gate, either a wooden or a metal gate – there are no in game differences other than the appearance of the gate.
There are also air locks and a wooden guest gate too, for walk through or drive through habitats.
Over time, animals will often damage barriers, so ensure you have a mechanic on hand and in the relevant work zones to assign to the job.
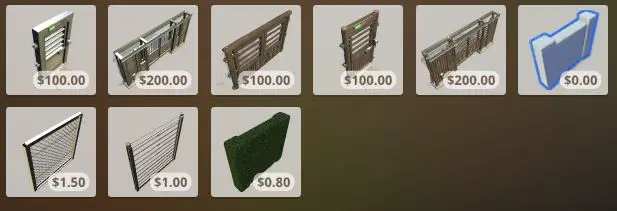
Type of Barriers
Each barrier has its own attributes and features that will define the habitat and have an effect on the type of animal within in.
| Barrier | Cost $ | Resistance Grade | Opacity | Climbable | Watertight |
|---|---|---|---|---|---|
| Null | 0 | N/A | N/A | Yes | No |
| Concrete | $2.00 | 6 | Opaque | No | Yes |
| Glass | $3.50 | 2 | Transparent | No | Yes |
| 1-Way Glass | $5.00 | 2 | Transparent 1 way / opaque | No | Yes |
| Wood Logs | $1.20 | 3 | Opaque | Yes | No |
| Steel Mesh | $3.00 | 4 | Semi Transparent | Yes | No |
| Red Brick | $1.75 | 5 | Opaque | No | Yes |
| Gabion | $1.50 | 5 | Opaque | Yes | No |
| Corrugated | $1.00 | 2 | Opaque | No | No |
| Chain Link | $1.50 | 2 | Semi Transparent | Yes | No |
| Electric | $1.00 | 6* | Semi Transparent | No** | No |
| Hedge | $0.80 | 1 | Opaque | Yes | No |
*if powered, 1 if not.
**if powered, climbable if not powered.
The Null Barrier
The null barrier is an invisible barrier which you can use to create habitats.
This is useful when using things like rocks, logs and the terrain to stop animals escaping rather than a barrier fence. It provides the ability to create a more natural looking habitat.
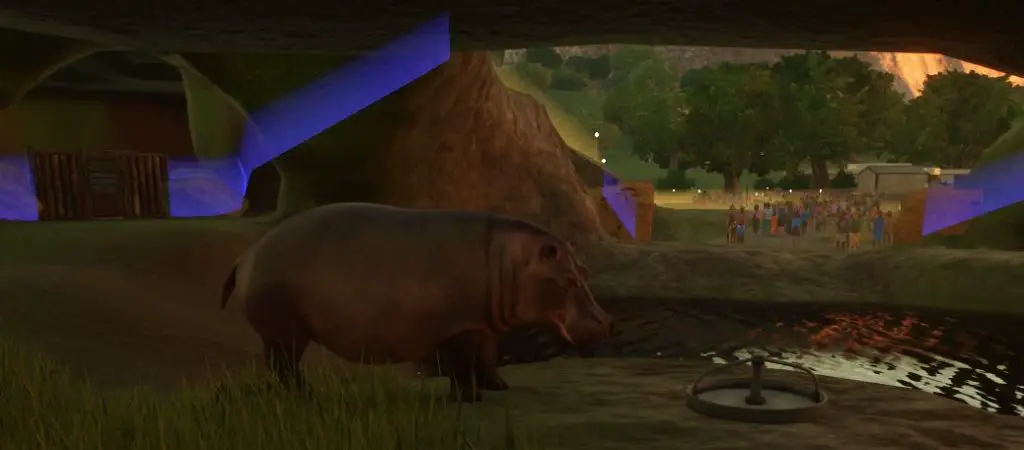
Ensure that the null barrier covers everywhere your animals may go within the perimeter of the null barrier, and remember to make sure the guests have a viewing point where they can actually see the animals.
Be careful that animals like monkeys cant interact with climbable objects and just jump over the null barrier.
Barrier Features Explained
Resistance Grade
This is the strength of the barrier. The higher the resistance grade, the harder it is for animals to damage over time.
We don’t want our animals to be scratching their way through weak fencing if they have sharp claws for example.
Within an animal’s Zoopedia in the Natural Habitat tab, you’ll be able to see the resistance grade required in the minimum habitat requirements section, as well as a minimum height requirement.
You must implement both of these requirements, unless you want an animal to eventually escape.
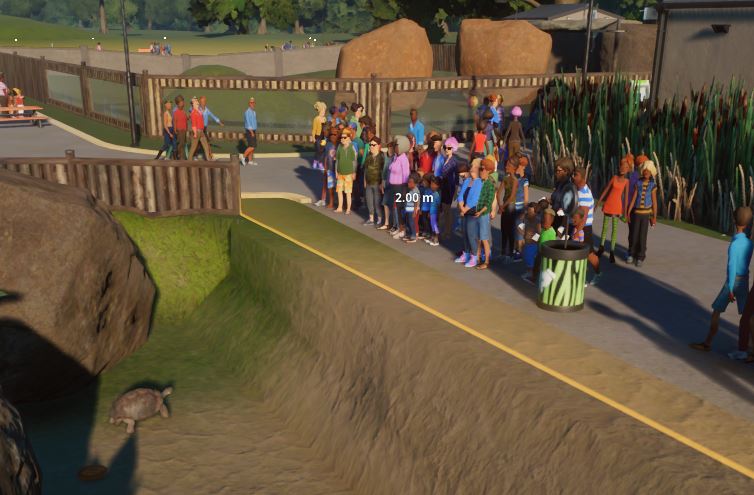
Opacity
This tells us how much we can see through the barrier and will also have an effect on the animal’s privacy.
Climbable
Many animals, especially monkeys, are able to climb very easily in Planet Zoo.
Within the minimum habitat requirements of an animal’s Zoopedia page, you’ll be able to find whether the barrier required needs to be non-climbable.
If so, make sure you select the relevant barrier to keep animals contained.
TIP: You can make some climbable barriers non-climbable in the settings of the barriers when editing. Read more here.
Watertight
If a barrier is watertight, it means water won’t be able to escape through holes or be absorbed by the barrier.
You’ll need to use watertight barriers where you have created pools or lakes within your habitats. Alternatively, you can use the terrain building tools to landscape areas where water can’t escape.
TIP: If you have habitats next to each other that share a barrier, remember to get the height and resistance correct for both habitats.
Barrier Building Tips & Options
Adjusting Your Barrier
To select and edit the whole of the habitat barrier, select a part of the barrier and then click and drag the button that looks like an arrow, with a big and small triangle. This allows you to drag a selection around the whole barrier.
Once you’ve made your selection, you can move it using the button with the 4 arrows, or adjust the height of the barriers you’ve selected with the up and down pointing arrows.
Tip: If you adjust the terrain around your barriers and it creates gaps underneath, edit the barrier, adjust the height slightly and it’ll fix its self so that animals can’t escape.

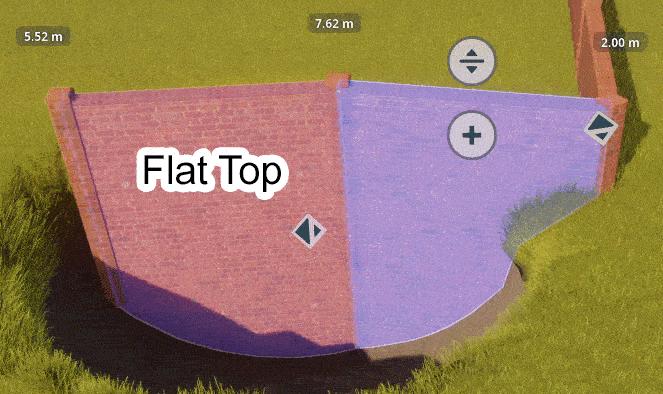
Height Mode
These options allow you to change the length of the barrier when the terrain is uneven.
Undulating: will ensure the height and vertical length of the barrier is always the same.
Flat top: keeps the height of the barrier constant, but will increase the vertical length of the barrier in areas where the terrain may be lower.
If the terrain drops into a canyon and you build your barrier through this, the barrier’s height will remain constant to the height where it was being built from, but will extend the vertical length to reach the bottom of the canyon, creating a flat top.
Flat top and editable bottom: pretty pointless in all honestly – you shouldn’t need it. Essentially, it’s like the flat top but you’re supposed to be able to edit the barrier from the bottom, however the barrier needs to touch the floor anyway.
Angle Snap
Keeps the fence direction snapped to the angle set. Useful when trying to create a square shaped habitat or rectangular habitat.
Turn off angle snap and you can place your barriers in whatever direction you choose.
Length
The length of the barrier you’re placing.
Height Snap
When adjusting the height of your barrier, it will raise or lower the eight in increments of whatever value is set. For example, if the value is set to 1 meter and you begin raising the height of the barrier, it will raise 1 meter at a time.
Snap To Adjacent Heights
This will keep snap the height of the barrier you’re editing to the height of the barrier next to it. Useful for levelling height.
Window
The options here include no window, glass, and one way glass.
Glass will create a window within the barrier.
One way glass allows guests to see in whilst the animals can’t see out, allowing them to have increased privacy.
Sometimes you will need to edit which way around the one way glass allows you to see through. You can do this on the barrier settings menu. The darker opaque side should be on the habitat side.
Height Labels
This is an option for personal preference more than anything. Height labels can be turned off, set to how high the barrier is above the ground, or how high the barrier is above sea level so that every barrier in your zoo’s height is related to the same value.
The sea level height label is useful when you have a very uneven terrain and you want to maintain the habitat’s barrier height.
Camera
The options here will adjust your perspective when building the barrier and again is down to personal preference.
Curved Barriers
Some barriers will allow you to curve them rather than building them straight. Alternatively, you can curve non-curvable barriers (bear with me) by using a barrier that can be curved, building it, and then editing the barrier and selecting the type of barrier you wanted.
For example, you can curve a brick barrier, then edit it and select the wooden barrier to replace the bricks with wood.
Hopefully that makes sense…
Barrier Settings
Climb Proof
Some climbable barriers can be made climb proof here by adding blockers at the top of the barriers. Ensure you select the correct side of the barrier that needs to be climb proof or both if you have habitats next to each other that contains animals that may be able to climb out.
Curved Barrier Top
If you’d like a fancy curvy barrier heights have a play around with this setting. Use the two angle variables to find something that works for your habitat.
Plan Ahead
So there’s your Planet Zoo barriers guide. Plan ahead when building your habitats and you’ll run into less issues further down the line.
Remember, build strong and stable barriers that match the animal’s minimum habitat requirements and you won’t go wrong.
Make sure there are no gaps and that mechanics are swiftly on the job to repair any damages, otherwise your guests may get a nasty surprise.